ეტაპობრივი ინსტრუქცია: ვებსაიტის სერვერზე ატვირთვა
მეტა აღწერა: Learn how to upload a website to a server with this comprehensive step-by-step guide, covering file preparation, hosting choices, file transfer methods, and server configuration.
შესავალი
Ah, the thrill of creating your very own website! You’ve spent hours tinkering with code, designing eye-catching layouts, and filling your digital space with content. But now comes the moment of truth: how to upload that masterpiece onto a server so that it’s accessible to anyone with a browser. It's the culmination of your hard work, and trust me, getting this step right can make all the difference between a successful launch and a frustrating setback.
No need to fret! With a little guidance, you’ll have your site live in no time. In this guide, we will break down the process into digestible pieces—after all, there’s nothing worse than feeling overwhelmed when you’re just a few clicks away from your big reveal.
Preparing Your Website Files for Upload
Before you can even think about uploading a website, you need to ensure that all your files are prepped and ready. This essential stage is all about organization and final touches.
Organizing Your Files
The first step in preparation is to gather your website files in one easily accessible folder. Think of it as packing your bags before a trip—you wouldn’t want to forget anything!
Here’s what to include:
- HTML files: These are the backbone of your site, with
index.htmlgenerally serving as your homepage. - CSS files: The stylish outfits that make your site pretty.
- JavaScript files: The interactive elements that lay 'life' into your static pages.
- Images and other assets: Everything from jpgs and pngs to any video or audio files you might want to showcase.
Local Testing
Before daring to press “upload,” run a thorough test of your website locally. Open your index page in various browsers—Chrome, Firefox, Safari—to catch any potential issues. You need every slider, button, and link working seamlessly, just like your web host is meant to support them. The last thing you want is to reveal a broken website to your audience.
Choosing Your Hosting Solution
With your files neatly organized and thoroughly tested, the next challenge is selecting the right hosting service. It’s like choosing the right neighborhood for your new home; you want it to be safe and reliable.
Types of Hosting
- გაზიარებული ჰოსტინგი: Affordable and user-friendly, perfect for beginners or small projects. However, you share resources with other websites, which might slow things down during peak traffic.
- VPS (Virtual Private Server): A step up from shared; you maintain more control and get dedicated resources without breaking the bank.
- Dedicated Hosting: The ultimate choice for large sites demanding high resources. It’s on the pricey side, but you have the entire server to yourself—like owning a mansion!
- Cloud Hosting: Flexible and scalable, ideal for growing websites. You pay for what you use, which can accommodate fluctuating traffic.
Choosing the right hosting service isn't just technical; it provides a foundation for your dreams, influencing speed, security, and even uptime.
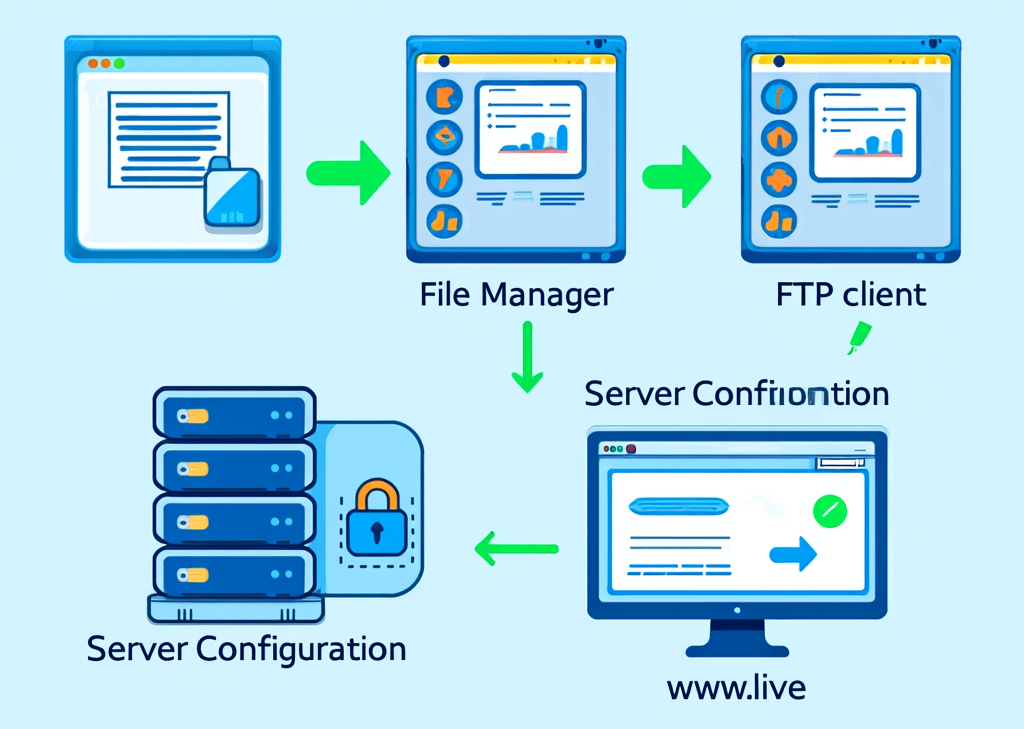
Uploading Your Files to the Server
Now, the moment you’ve all been waiting for: transferring files to your server. This might sound daunting, but once you get the hang of it, it’s as easy as dragging and dropping.
Selecting Your Upload Method
Different methods can make uploading a breeze. Some folks prefer the simplicity of graphical interfaces, while others might opt for speed through code.
Here are a couple of methods to consider:
- File Manager: Most hosting companies offer a File Manager through their control panel, such as cPanel. It’s like a web-based version of your desktop where you can upload files directly.
- FTP Clients: If you’re dealing with lots of files or larger assets, using software like FileZilla or Cyberduck gives you that power. You’ll connect via FTP (File Transfer Protocol) and have a user-friendly view to drag-and-drop files into your server.
Example for Using FTP:
- Download and install an FTP client like FileZilla.
- Gather your FTP credentials from your hosting provider: host, username, password, and port.
- Connect, then navigate to your local website directory.
- Find the server’s target directory (often
public_html). - Drag and drop your files and wait for them to upload—voilà!
A nifty trick is uploading a zipped folder of your website and extracting it on the server afterward, which can save you time if lots of files are involved.
Configuring Your Web Server
Once everything is uploaded, it’s not time to celebrate just yet. You need to ensure that your server is configured properly. This involves setting everything up so your site is not only functional but also secure.
Stay tuned as we explore testing your live site and necessary configurations in the next part!
FINDDOMAIN.GE (შპს ინტერნეტ სერვისები) ძალიან საინტერესო და სწრაფად განვითარებადი IT კომპანიაა. ძირითადი მიმართულებებია: ვებ-განვითარება, დომენები და ვებ-ჰოსტინგი. ის ასევე სთავაზობს კლიენტებს ძირითად სერვისებთან დაკავშირებულ ქვე-მომსახურებას და აუთსორსინგს.
საუკეთესო შეთავაზებები:
გსურთ შექმნათ თქვენი საკუთარი კომპანიის ვებსაიტი ან შექმნათ თქვენი საკუთარი ონლაინ ბიზნესი ინტერნეტში?
– ვებ ჰოსტინგი
– დომენის რეგისტრაცია
– ვებ-განვითარება
– საიტის შემქმნელი


Configuring Your Web Server: Essential Steps
After everything is uploaded, your next order of business is to ensure your web server is configured correctly. Think of this as tuning an engine; every component needs to work in harmony for optimal performance. Here’s how to get it just right.
Setting Up Server Blocks or Virtual Hosts
Depending on your server type, you’ll either set up server blocks (if you’re using Nginx) or virtual hosts (if you’re using Apache) to serve your website files properly. This tells the server how to handle incoming requests for your domain.
Here’s a quick overview of what you need to do:
- ამისთვის აპაჩი: Modify the
httpd.confor create a.conffile in thesites-availabledirectory.
<VirtualHost *:80>
    ServerName yourdomain.com
    DocumentRoot /path/to/your/public_html
    <Directory /path/to/your/public_html>
        AllowOverride All
        Require all granted
    </Directory>
</VirtualHost>
- ამისთვის Nginx: Create a new server block configuration file in
/etc/nginx/sites-available.
server {
    listen 80;
    server_name yourdomain.com;
    root /path/to/your/public_html;

    location / {
        index index.html index.htm;
    }
}
After saving your configurations, ensure to restart the server for changes to take effect.
Securing Your Website with SSL
A crucial step in the setup process is securing your website with an SSL სერტიფიკატი. Enabling HTTPS not only strengthens security but also boosts SEO rankings. Many hosting providers offer free SSLs through services like მოდით, დაშიფვრა გავაკეთოთ. The installation process generally involves:
- Acquiring the SSL certificate via your hosting control panel.
- Configuring your web server to use the SSL certificate, which may look something like this for Nginx:
server {
    listen 443 ssl;
    server_name yourdomain.com;

    ssl_certificate /path/to/your/fullchain.pem;
    ssl_certificate_key /path/to/your/privkey.pem;

    root /path/to/your/public_html;
}
- Redirecting HTTP to HTTPS by adding a rule to your server configuration.
Setting Permissions and Access Control
Access permissions ensure that the right users can reach the files they need while keeping unwanted entities at bay. Linux servers typically use a permission model of read, writeდა execute, which can be adjusted via the command line or through your control panel.
It's essential to ensure directories have permissions like 755 and files 644 to prevent unauthorized access but still allow normal operations. Set directory permissions with:
chmod 755 /path/to/your/public_html
And file permissions with:
chmod 644 /path/to/your/public_html/*
Testing Your Website Thoroughly
Once everything is configured and permissions set, it’s all about ensuring the site behaves as expected. Start by visiting your domain in a web browser. It should load without any hiccups.
Key tests include:
- Check that your homepage (
index.html) renders correctly. - Click through various links to catch any broken connections.
- Inspect that assets like images and CSS files load properly; nothing ruins a design faster than broken links.
If you don’t see changes you expect, don’t forget to clear your browser cache! It can often masquerade old files as new.
Responsive Analysis and Performance Optimization
Post-launch, continuous improvement will keep your website in shape. Consider running your site through tools like Google PageSpeed Insights or GTmetrix to identify any areas needing optimization. Compression techniques for your images and minifying CSS and JS files can enhance loading times significantly.
Installing a caching plugin can also keep your site responsive by storing static versions of your web pages.
Another important aspect: test your site across different devices. Opening it on mobile, tablets, and desktops showcases how versatile and user-friendly it is.
დამატებითი რესურსები
Looking to dive even deeper? Here are some helpful video links that can guide you through specific aspects of uploading and configuring your website:
- How to Upload Your Website Using FTP
- Installing an SSL Certificate
- Configuring Apache Virtual Hosts on Ubuntu
- Nginx Server Block Configuration for Beginners
Nothing compares to that exhilarating moment when you finally see your hard work transformed into a live website. Armed with the skills to upload and configure your server, you’re poised for success in building your digital presence. Transform your dream into reality and let your audience discover what you’ve created!
ცნობები
- Hostinger Website Upload Tutorial
- SiteGround FTP Upload Guide
- WPBeginner SSL Installation
- W3Schools – What is FTP?
საუკეთესო შეთავაზებები:
გსურთ შექმნათ თქვენი საკუთარი კომპანიის ვებსაიტი ან შექმნათ თქვენი საკუთარი ონლაინ ბიზნესი ინტერნეტში?
– ვებ ჰოსტინგი
– დომენის რეგისტრაცია
– ვებ-განვითარება
– საიტის შემქმნელი


