<h1>როგორ გამოვიყენოთ სცენის გარემო WordPress-ის ჰოსტინგში</h1>
<h2>შესავალი</h2>
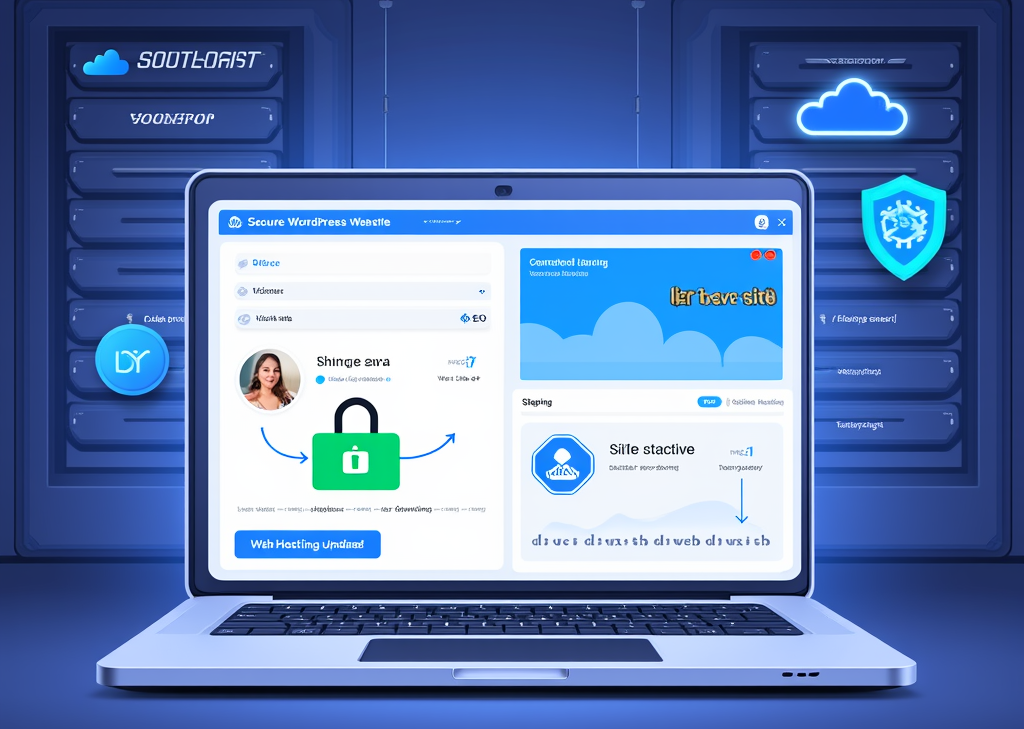
ვებ-განვითარების დატვირთულ, მუდმივად განვითარებად სამყაროში, სადაც ყველა დაწკაპუნება მნიშვნელოვანია და ერთი შეცდომაც კი შეიძლება კატასტროფად გადაიქცეს, ექსპერიმენტებისთვის უსაფრთხო სივრცის ქონა აუცილებელია. სწორედ აქ ერთვება **WordPress-ის სამონტაჟო გარემო** - თავშესაფარი დეველოპერებისთვის, დიზაინერებისთვის და ვებსაიტების მფლობელებისთვის, რაც მათ საშუალებას აძლევს შიშის გარეშე გამოსცადონ ცვლილებები, როგორც ეს უსაფრთხო რეპეტიციაა მნიშვნელოვანი შოუს წინ. წარმოიდგინეთ თქვენი ონლაინ მაღაზიის გადახდის პროცესის შეცვლა ან თქვენი საიტის დიზაინის განახლება, მაგრამ თქვენი მომხმარებლების გამოცდილებაზე ზემოქმედების შიშის გარეშე. დღეს ჩვენ ჩავუღრმავდებით, თუ რა არის სამონტაჟო გარემო და როგორ შეგიძლიათ მათი ეფექტურად დაყენება თქვენს WordPress ჰოსტინგში.
<h2>რა არის სცენის გარემო WordPress-ში?</h2>
სამონტაჟო გარემო თქვენი WordPress საიტის დუბლიკატზე მეტია; ეს არის ძლიერი სათამაშო მოედანი, სადაც ინოვაცია შესაძლებელია საზოგადოებრივი კონტროლის რისკის გარეშე. ჰოსტირებულია როგორც ქვედომენზე, როგორიცაა **staging.yoursite.com**, ასევე თქვენი ჰოსტინგის სივრცის ცალკე განყოფილებაში, ის საშუალებას გაძლევთ **დაიცვათ თქვენი საწარმოო საიტი** ახალი ფუნქციების შესწავლისას, პრობლემების მოგვარებისა და მომხმარებლის მოგზაურობის დახვეწის პარალელურად. ყველაზე ნაკლებად რაც ვინმეს სურს არის ცვლილებების განლაგება, მხოლოდ იმისთვის, რომ აღმოაჩინოს შემაძრწუნებელი შეცდომა, რომელიც მომხმარებლებს იმედგაცრუებას და ალტერნატივების ძიებაში ტოვებს. - **სამონტაჟო გარემოს ძირითადი მიზნები:** - უსაფრთხო თავშესაფარი ახალი განახლებების ან ფუნქციების შესამოწმებლად - პოტენციური შეცდომების ადრეული გამოვლენა, დანამატებთან თავსებადობის პრობლემები ან დიზაინის ხარვეზები - აქ შეგიძლიათ სცადოთ შესრულების ოპტიმიზაცია თქვენი საიტის სიჩქარეზე ზემოქმედების რისკის გარეშე - ხელს უწყობს თანამშრომლობას - კლიენტებს შეუძლიათ გადახედონ პოტენციურ ცვლილებებს ტექნიკური ჟარგონის გამოყენების გარეშე - ნულოვანი შეფერხების განლაგება, რაც ნიშნავს, რომ თქვენი ვებსაიტი რეაგირებს განახლებების დროსაც კი. წარმოიდგინეთ თავი გემის კაპიტნად. **გაივლიდით ნაოსნობას ამინდის პროგნოზის შემოწმების გარეშე?** არა, ტალღებზე გასვლამდე უნდა დარწმუნდეთ, რომ თქვენი გზა თავისუფალია. ანალოგიურად, სადესანტო საიტი უზრუნველყოფს, რომ თქვენი ნავიგაციის განახლებები გემის ჩაძირვას არ გამოიწვევს.
<h2>როგორ შევქმნათ WordPress-ის სცენარის გარემო</h2>
თავიდან სცენაზე დასადგმელი გარემოს შექმნა შეიძლება შემაძრწუნებლად მოგეჩვენოთ, მაგრამ დარწმუნებული იყავით; მისი მიღწევა შესაძლებელია სხვადასხვა სირთულის დონით, ტექნოლოგიებთან თქვენი კომფორტის მიხედვით. აქ მოცემულია სამი ძირითადი მეთოდი, რომელთა შესწავლაც შეგიძლიათ:
<h3>1. თქვენი ჰოსტინგის პროვაიდერის ჩაშენებული ეტაპობრივი ინსტრუმენტების გამოყენება</h3>
ბევრი რეპუტაციის მქონე WordPress ჰოსტი, როგორიცაა **SiteGround, Bluehost, WP Engine და Kinsta**, გთავაზობთ მომხმარებლისთვის მოსახერხებელ ჩაშენებულ ინსტრუმენტებს. ეს ნიშნავს, რომ თქვენ შეგიძლიათ შექმნათ ინსტრუმენტული გარემო რამდენიმე დაწკაპუნებით, მაგალითად, ყავის ონლაინ შეკვეთით - სწრაფად და ეფექტურად. - **ნაბიჯები SiteGround-ზე (მაგალითი):** - შედით თქვენს SiteGround ანგარიშზე და გადადით **ვებსაიტებზე** > **ინსტრუმენტული ასლის შექმნა**. - აირჩიეთ საიტი, რომლის კლონირებაც გსურთ და დააჭირეთ **ინსტრუმენტული ასლის შექმნას**. - დაელოდეთ ჯადოსნური პროცესის დაწყებას; როგორც წესი, ეს მხოლოდ რამდენიმე წუთია. - შედით ინსტრუმენტულ საიტზე მოსახერხებელი ბმულიდან. ინტეგრირებული ხელსაწყოებით, თქვენ ხშირად სარგებლობთ ავტომატური სარეზერვო ასლებით და მარტივი გაუქმებით, რაც გთავაზობთ სიმშვიდეს, რაც ყველაზე შეშფოთებულ ვებმასტერსაც კი გაუადვილებს სუნთქვას.
<h3>2. WordPress-ის ეტაპობრივი დანამატების გამოყენება</h3>
თუ თქვენ ჰოსტინგს ახორციელებთ პლატფორმაზე, რომელსაც არ აქვს ჩაშენებული სტადინგის ფუნქციები ან გსურთ მეტი კონტროლი, WordPress-ის დანამატები, როგორიცაა **WP Staging ან Duplicator**, გთავაზობთ საიმედო გადაწყვეტილებებს, რომლებიც თითქმის ისე ფუნქციონირებენ, როგორც პირადი მწვრთნელი, რომელიც დაყენების პროცესში დაგეხმარებათ. - **როგორ დავიწყოთ:** - დააინსტალირეთ ისეთი დანამატი, როგორიცაა WP Staging, პირდაპირ WordPress-ის დანამატების დირექტორიიდან. - გააქტიურების შემდეგ, გადადით WP Staging-ის პარამეტრებში და დააწკაპუნეთ **სტადინგის საიტის შექმნა**. - ის მოგთხოვთ სახელს და შემდეგ გააგრძელებს თქვენი ცოცხალი საიტის კლონირებას სტადინგის გარემოში. ეს ინსტრუმენტები ამარტივებს პროცესს და ამცირებს დაყენების დროს ხელით შეცდომების შესახებ შეშფოთებას, რაც საშუალებას გაძლევთ ფოკუსირდეთ მნიშვნელოვანზე - თქვენი მომხმარებლებისთვის შესანიშნავი საიტის შექმნაზე.
<h3>3. ხელით შექმნა cPanel-ის ან FTP-ის საშუალებით (გაფართოებული)</h3>
ჩვენ შორის ტექნიკურად გათვითცნობიერებულებისთვის, სცენაზე დასაყენებელი გარემოს შექმნა ასევე შესაძლებელია ხელით cPanel-ის ან FTP-ის მეშვეობით. მიუხედავად იმისა, რომ ეს მეთოდი გარკვეულ ექსპერტიზას მოითხოვს, ის სცენაზე დასაყენებელ პროცესზე სრულ კონტროლს გთავაზობთ. - **აქ მოცემულია მოკლე მონახაზი, თუ როგორ უნდა გაუმკლავდეთ ამას:** - დაიწყეთ თქვენი აქტიური საიტის სარეზერვო ასლის შექმნით - ყველა ფაილი და მონაცემთა ბაზა უნდა იყოს უსაფრთხოდ დალუქული აღდგენისთვის. - შექმენით ახალი ქვედომენი (მაგალითად, **staging.yoursite.com**). - შემდეგ, გამოიყენეთ FTP ან ფაილების მენეჯერი ფაილების თქვენი აქტიური საიტიდან ახალ ქვედომენზე კოპირებისთვის. - არ დაგავიწყდეთ მონაცემთა ბაზის იმპორტი და **wp-config.php** ფაილის შეცვლა, რათა ის ახალ მონაცემთა ბაზასთან დააკავშიროთ. - და ბოლოს, დარწმუნდით, რომ სცენაზე დასაყენებელი საიტი დაყენებულია **no-index**-ზე, რათა საძიებო სისტემებმა არ შეძლონ თქვენი რეპეტიციის ინდექსირება. ეს მოწინავე გზა უზრუნველყოფს შეუდარებელ კონტროლს, მაგრამ მოითხოვს დეტალებისადმი ზედმიწევნით ყურადღებას - შეცდომებმა შეიძლება თავის ტკივილი გამოიწვიოს.
<h2>WordPress-ის სცენარის გარემოს გამოყენების საუკეთესო პრაქტიკა და რჩევები</h2>
თქვენი საინსტეიშენ გარემოს ეფექტურობის მაქსიმალურად გაზრდის მიზნით, გაითვალისწინეთ შემდეგი საუკეთესო პრაქტიკები: - **ყოველთვის შექმენით თქვენი ცოცხალი საიტის სარეზერვო ასლი** სინქრონიზაციამდე ან ცვლილებების განთავსებამდე, რათა დაიცვათ თქვენი შრომა მოულოდნელი წარუმატებლობისგან. - გამოიყენეთ **ინდექსის გარეშე თეგები ან პაროლის დაცვა** საინსტეიშენ საიტებზე, რათა ისინი დამალული დარჩეს საძიებო სისტემებისგან, რათა თავიდან აიცილოთ დუბლირებული კონტენტის ჯარიმები. - **შეამოწმეთ ყველა ახალი მოდული, თემა და მნიშვნელოვანი განახლება** თქვენს საინსტეიშენ გარემოში, იქნება ეს ახალი განლაგება თუ დრამატული ახალი ფუნქცია. - **გამოიყენეთ საინსტეიშენი ტრენინგის მიზნებისთვის.** მიეცით საშუალება გუნდის ახალ წევრებს გაეცნონ WordPress-ს რისკის გარეშე გარემოში. - **რეგულარულად სინქრონიზეთ თქვენი საინსტეიშენ საიტი** რეალურ საიტთან, რათა დარწმუნდეთ, რომ ტესტირება რელევანტურია თქვენი აქტიური კონტენტისთვის. - განათავსეთ ცვლილებები პიკის საათების გარდა - ვებ ტრაფიკის შუქურის გვერდის ავლით, რაც უზრუნველყოფს შეუფერხებელ ნაოსნობას. - გამოიყენეთ თქვენი ჰოსტინგის პროვაიდერის მხარდაჭერა, თუ დაყენების ან განახლებების დროს გზაზე დაბრკოლებებს წააწყდებით. მათი ექსპერტიზა შეიძლება ფასდაუდებელი იყოს. WordPress-ის სამონტაჟო გარემოს შექმნის მკაფიო გაგებით, თქვენ შეგიძლიათ თავდაჯერებულად გაიაროთ ვებ-განვითარების ტალღები, რაც უზრუნველყოფს, რომ თქვენც და თქვენი აუდიტორიაც ისიამოვნოთ მაქსიმალურად შეუფერხებელი გამოცდილებით.
საუკეთესო შეთავაზებები:
გსურთ შექმნათ თქვენი საკუთარი კომპანიის ვებსაიტი ან შექმნათ თქვენი საკუთარი ონლაინ ბიზნესი ინტერნეტში?
– ვებ ჰოსტინგი
– დომენის რეგისტრაცია
– ვებ-განვითარება
– საიტის შემქმნელი


„html“
ცვლილებების დანერგვა ეტაპობრივი ვერსიიდან პირდაპირ ეთერში
ახლა, როდესაც თქვენ ექსპერიმენტი ჩაატარეთ, დახვეწეთ და გამოსცადეთ თქვენი ცვლილებები სცენაციურ გარემოში, დროა გრანდიოზული ფინალისთვის - ამ ცვლილებების თქვენს რეალურ საიტზე განთავსებისთვის. ეს ეტაპი კრიტიკულად მნიშვნელოვანია; საქმე ეხება თქვენი შრომისმოყვარეობის აღებას და თქვენი აუდიტორიისთვის შეუფერხებელი გადასვლის უზრუნველყოფას.
1. გადახედეთ და დაასრულეთ თქვენი ცვლილებები
განლაგების ღილაკზე დაჭერამდე, უკან დაიხიეთ და ღრმად ჩაისუნთქეთ. ბოლოჯერ გადახედეთ ყველაფერს და დარწმუნდით, რომ ყველა ცვლილება საფუძვლიანად არის შემოწმებული. შეამოწმეთ გატეხილი ბმულები, დარწმუნდით, რომ განლაგება იდეალურად გამოიყურება ყველა მოწყობილობაზე და დაადასტურეთ, რომ ყველა ფუნქციონალი მუშაობს.
- რჩევა: განიხილეთ საკონტროლო სიის მომზადება, რომელიც მოიცავს თქვენს მიერ შეცვლილ ყველა ასპექტს. ეს საკონტროლო სია ფარის როლს ასრულებს მოულოდნელი სიურპრიზებისგან და უზრუნველყოფს, რომ არც ერთი პატარა დეტალი არ გამოგრჩათ.
2. ცვლილებების ამოქმედება
იმისდა მიხედვით, თუ როგორ დააყენებთ თქვენს სცენარის გარემოს, ამ ცვლილებების განხორციელების პროცესი განსხვავებული იქნება:
- ჰოსტინგის ინსტრუმენტებისთვის: თუ თქვენ გამოიყენეთ ჩაშენებული ეტაპობრივი შექმნის ფუნქციები, უბრალოდ გადადით თქვენს მართვის პანელზე და იპოვეთ ოფცია ეტაპობრივი შექმნის გარემოს გამოქვეყნების ან განლაგების მიზნით. ეს მოქმედება, როგორც წესი, ავტომატურად ირთვება სარეზერვო ასლის შექმნის ფუნქციებიც.
- დანამატებისთვის: თუ თქვენი სტადირების საიტის შესაქმნელად გამოიყენეთ დანამატი, გადადით დანამატის პარამეტრებში და მოძებნეთ ცვლილებების რეალურ დროში განთავსების ვარიანტი. ეს პროცესი, როგორც წესი, გთავაზობთ მიმოხილვას, თუ რა განახლდება, რაც ინფორმირებულობას გაჩუქებთ.
ამ მეთოდების მეშვეობით, თქვენ შეგიძლიათ თქვენი სამუშაო საათები დადგმის უსაფრთხო ჩარჩოებიდან თქვენი ონლაინ საიტის ხმაურიან სამყაროში გადაიტანოთ.
განლაგების შემდგომი მონიტორინგი
ცვლილებების ამოქმედების შემდეგ თქვენი სამუშაო დასრულებული არ არის. საიტის მონიტორინგი განლაგების შემდეგ უმნიშვნელოვანესია. თქვენ უნდა დარწმუნდეთ, რომ ყველაფერი სწორად მუშაობს და მომხმარებლის გამოცდილება უმაღლეს დონეზე რჩება.
1. შეცდომების შემოწმება
ცვლილებების განთავსებისთანავე, გადადით თქვენს საიტზე ისე, როგორც ამას მომხმარებელი გააკეთებდა. დააწკაპუნეთ ბმულებზე, დაამატეთ პროდუქტები კალათაში და დაათვალიერეთ სხვადასხვა გვერდები. ეს პრაქტიკული მიდგომა დაგეხმარებათ შეცდომების აღმოჩენაში, სანამ ისინი რეალურ მომხმარებლებზე იმოქმედებენ.
- პროფესიონალური რჩევა: განახლების შემდეგ მომხმარებლების თქვენს საიტთან ურთიერთქმედების მონიტორინგისთვის გამოიყენეთ ისეთი ინსტრუმენტები, როგორიცაა Google Analytics და Hotjar. ეს მონაცემები პრობლემების ადრეულ ეტაპზე აღმოჩენაში დაგეხმარებათ.
2. საჭიროების შემთხვევაში უკან დაბრუნება
თუ შემთხვევით წააწყდებით პრობლემას, რომელიც მომხმარებლის გამოცდილებას არღვევს, ნუ ჩავარდებით პანიკაში. ჰოსტინგის პროვაიდერებისა და სამონტაჟო პლაგინების უმეტესობა გთავაზობთ წინა სტაბილურ ვერსიაზე დაბრუნების ვარიანტებს. ეს დაბრუნების ფუნქცია ნამდვილი ხსნაა - გთავაზობთ უსაფრთხოების ბადეს, რათა თქვენი ვიზიტორები არ აღმოჩნდებიან ქაოტურ სიტუაციაში.
ოპტიმიზაცია და იტერაცია
წარმატებული განლაგებისა და ყველაფრის შეუფერხებელი ფუნქციონირების უზრუნველყოფის შემდეგ, წარმოიდგინეთ ეს, როგორც გაუმჯობესების უწყვეტი ციკლი. ეტაპობრივი გარემო არ არის მხოლოდ ერთჯერადი ტესტირებისთვის, არამედ თქვენი შემუშავების სამუშაო პროცესის ინტეგრირებული ნაწილია.
1. რეგულარული იტერაციები
ტექნოლოგიების განვითარებასთან და მომხმარებლის მოლოდინების ცვლილებასთან ერთად, თქვენი საიტის განახლება აუცილებელია. რეგულარულად გამოიყენეთ თქვენი საინსტალაციო გარემო WordPress-ის ბირთვის, დანამატებისა და თემების ახალი განახლებების შესამოწმებლად, რათა მინიმუმამდე დაიყვანოთ პოტენციური შეფერხებები. შეიმუშავეთ ფიტნეს ვარჯიშის მსგავსი რუტინა - იყავით ინფორმირებული იმის შესახებ, თუ რა უნდა განახლდეს სესიების გამოტოვების გარეშე!
2. უკუკავშირის გამოყენება
შეაგროვეთ თქვენი მომხმარებლებისა და გუნდისგან უკუკავშირი ცვლილებების შესახებ. მომხმარებლის გამოცდილების გამოკითხვები ან უკუკავშირის ფორმები დაგეხმარებათ იმ სფეროების იდენტიფიცირებაში, რომლებსაც ყურადღება სჭირდებათ. წარმატებული ვებსაიტი ადაპტაციასა და პროგრესზეა აგებული; საჭიროების შემთხვევაში, ნუ მოერიდებით კურსის შეცვლას.
თქვენს გუნდში ეტაპობრივი სამუშაო პროცესების ინტეგრირება
თუ თქვენ დეველოპერების გუნდის წევრი ხართ, თანამშრომლობისთვის აუცილებელია ეტაპობრივი გარემოს გამოყენებისადმი სისტემური მიდგომის შექმნა.
1. მკაფიო კომუნიკაცია
გუნდის წევრებს შორის კომუნიკაცია იმის შესახებ, თუ რა ცვლილებებია დაგეგმილი ეტაპობრივ გარემოში, უმნიშვნელოვანესია. საერთო დოკუმენტი, რომელიც ასახავს, თუ ვინ რაზე მუშაობს, ხელს შეუწყობს გადაფარვისა და პოტენციური კონფლიქტების თავიდან აცილებას. ასეთი კოორდინაცია ფასდაუდებელია, რადგან ის ყველას ერთსა და იმავე გვერდზე ათავსებს.
2. თანამშრომლობითი ტესტირება
წაახალისეთ თქვენი გუნდი, რომ ერთმანეთის ნამუშევრები გამოსცადონ ინსცენირებისას. ახალი თვალით დაკვირვება აღმოაჩენს შეცდომებს, რომლებიც შესაძლოა გამოგრჩათ, რაც გააუმჯობესებს თქვენი ნამუშევრის საერთო ხარისხს. შექმენით კულტურა, სადაც უკუკავშირი კონსტრუქციული და დასაფასებელია - ეს ხელს უწყობს ნდობას და აუმჯობესებს შესრულებას.
დასკვნითი აზრები
WordPress-ის სამონტაჟო გარემოს გამოყენება ვებ შემქმნელებს აძლევს შესაძლებლობას, დაიცვან აქტიური საიტების მთლიანობა და ამავდროულად ხელი შეუწყონ ინოვაციებს. ძლიერი სამუშაო პროცესის შექმნით და განლაგების შემდგომი მონიტორინგისა და მომხმარებლის უკუკავშირის ფხიზლად შენარჩუნებით, ნებისმიერს - იქნება ეს ინდივიდუალური მეწარმე თუ აქტიური სააგენტო - შეუძლია თავდაჯერებულად ნავიგაცია მოახდინოს ციფრულ ზღვებში. ამ გარემოების ინტეგრაცია არ არის მხოლოდ ტექნიკური ამოცანა; ეს არის სიფრთხილის, ადაპტირებისა და ვებ-განვითარების სრულყოფილების ფილოსოფია.
ვიზუალური ენის შემსწავლელებისთვის, შესაძლოა, ეს ვიდეო რესურსები სასარგებლო აღმოჩნდეს:
- როგორ შევქმნათ WordPress-ის ეტაპობრივი გარემო
- ცვლილებების დანერგვა ეტაპობრივი ვერსიიდან პირდაპირ ეთერში
გამოიყენეთ ეს სასიცოცხლოდ მნიშვნელოვანი ინსტრუმენტი და მიეცით თქვენს ვებსაიტს საშუალება, აყვავდეს შიშის გარეშე.
<hr>
<a target="_blank" href="https://www.finddomain.ge/">FINDDOMAIN.GE (შპს ინტერნეტ სერვისები) ძალიან საინტერესო და სწრაფად განვითარებადი IT კომპანიაა. ძირითადი მიმართულებებია: ვებ-განვითარება, დომენები და ვებ-ჰოსტინგი. ის ასევე სთავაზობს კლიენტებს ძირითად სერვისებთან დაკავშირებულ ქვე-მომსახურებას და აუთსორსინგს.</a>
<hr>
 <br/><br/>
<hr>
<strong>
საუკეთესო შეთავაზებები:<br/>
გსურთ შექმნათ თქვენი საკუთარი კომპანიის ვებსაიტი ან შექმნათ თქვენი საკუთარი ონლაინ ბიზნესი ინტერნეტში? </strong>
<a target="_blank" href="https://www.finddomain.ge/en/hosting/">- ვებ ჰოსტინგი</a>
<a target="_blank" href="https://billing.finddomain.ge/cart.php?a=add&domain=register&language=english">- დომენის რეგისტრაცია</a>
<a target="_blank" href="https://www.finddomain.ge/en/web-development/">- ვებ-განვითარება</a>
<a target="_blank" href="https://www.finddomain.ge/site-builder/">- საიტის შემქმნელი</a>
</br></br>
<a href="https://www.finddomain.ge/en/hosting/" target="_blank" rel="noopener"><img src="https://besthosting.ge/wp-content/uploads/2025/08/hosting-banner_en.jpg" /></a>
</br></br>
<a href="https://billing.finddomain.ge/cart.php?a=add&domain=register&language=english/" target="_blank" rel="noopener"><img src="https://besthosting.ge/wp-content/uploads/2025/08/domain-registration-en.jpg" /></a>
</br></br>
<a href="https://www.finddomain.ge/en/web-development/" target="_blank" rel="noopener"><img src="https://besthosting.ge/wp-content/uploads/2025/08/web-development-en.png" /></a>
</br></br>


დატოვეთ გამოხმაურება ამის შესახებ