How to Migrate Your Website to a New Hosting Provider
შესავალი
Migrating your website to a new hosting provider is more than just a change of scenery; it’s an opportunity for transformation. Maybe your current host is slow, unreliable, or simply overpriced. Whatever the reason, the migration process needs to be approached with a blend of caution and strategy. The effectiveness of this move directly impacts everything from website speed to user satisfaction, thereby influencing your brand's reputation.
Understanding the nuances of website migration is crucial. As you embark on this journey, you'll find that each detail made in the transition can protect you from downtime, data loss, and subsequent penalties in search engine rankings. With the right preparation, you can ensure a smooth transfer that enhances your website's performance and reliability without a hitch.
Planning and Choosing a New Host
The first step in the migration journey begins well before you ever click “send.” It starts with researching potential hosting providers that fit your specific needs. Dive into the criteria that matter, and take a good look at their offerings. Here are some essentials to consider when scouting for a new host:
-
Performance and Speed: In a consumer-driven world where attention is fleeting, fast load times are non-negotiable. Not only does speed improve user experience, but it also plays a significant role in SEO rankings.
-
მომხმარებელთა მხარდაჭერა: Problems don’t follow a schedule. Ensure you choose a host that provides stellar 24/7 customer support. Can you reach them at 2 AM? Will they offer help during emergencies? These questions are essential.
-
ფასები და გეგმები: Everyone loves a good deal, but striking the right balance between cost and feature set is critical. Look for hosts that don’t compromise quality for a lower price.
-
Migration Services: Some providers offer free ან discounted migration services, which can save you from the potential headaches of manual transfers and troubleshooting.
Following this evaluation, you might come across names like ჰოსტინგერი, which provides smooth transitions across varying website types—perfect for WordPress sites and beyond[1][4]. Additionally, consider DreamHost, SiteGroundდა Verpex. Each of these providers brings unique migration tools and features to help lighten your load.
Step-by-Step Migration Process
Once you've chosen a new host, the real work begins. Website migration involves several critical steps, and each requires diligence and attention to detail. Here’s a breakdown:
-
შექმენით თქვენი ვებსაიტის სარეზერვო ასლი
Start by securing your current website. Download all website files via FTP/SFTP tools like FileZilla. Don’t forget to export any databases using phpMyAdmin to ensure nothing is left behind.
-
Set Up the New Hosting Environment
Now, it’s time to configure your new home. Upload the previously backed-up website files onto your new host’s server by utilizing FTP/SFTP. Don't rush this step; it's crucial to ensure all files are accounted for. Additionally, create and import your databases on the new host's server and update your configuration files (like
wp-config.phpfor WordPress) with your new database credentials.[3] -
Test Your Website
Before announcing your grand reopening, test the waters. Use a temporary URL or your new host’s staging environment to confirm that everything is functioning properly. Check for broken links, verify that plugins and themes are intact, and ensure that forms work flawlessly.
-
Update DNS Settings
After the hard work of transferring your files and databases, it's time to direct the world to your new site. Change your domain’s DNS records to point to the new hosting provider's servers. Remember, DNS propagation can take up to 48 hours, so keep your old site running during this transition to prevent user frustration.[4][7]
-
Migrate Email Services
Email is often overlooked in the migration process. Backup your current emails and reconfigure them on your new host. As with the website, it's wise to allow both the old and new email systems to remain accessible during the switch to prevent any loss of communication.[6]
-
Final Checks
Once the DNS changes have propagated, double-check to ensure that your website is entirely operational. Monitor it for performance and uptime over several days; this period is crucial for identifying any hidden issues that may arise.
Many hosting providers extend free migration services aimed at facilitating this process. This resource can help minimize the risks of broken links or missing files, which often plague website migrations if approached haphazardly[1][4].
Additional Tips and Best Practices
During your migration journey, keep the following tips in mind:
-
Disable Security Features Temporarily: Features such as two-factor authentication can interfere with the migration process. Temporarily turning off these features can ease your transition.
-
Ensure Sufficient Disk Space: Verify that your old and new hosting accounts have enough space to accommodate backups and all transferred files.
-
Check Compatibility: Websites using custom builders like Shopify or Squarespace often cannot be migrated traditionally. If this is your case, you may need to rebuild your site.
-
Plan for Downtime: Migrate during off-peak hours to minimize disruptions to your users.
-
Maintain SEO Value: If URLs change during migration, use 301 redirects. Post-migration, double-check that your sitemap and
robots.txtfiles are properly configured to avoid SEO snags.
In the end, the journey of migrating your website can be exhausting, yet the rewards are palpable. Transitioning hosts can lead to improved performance, better support, and optimal costs. Careful planning and execution can transform a daunting task into a seamless experience. The next steps to ensure everything goes smoothly are vital, and our exploration will continue from here.

Monitoring and Post-Migration Best Practices
Once your website is live on the new hosting server, the hard work doesn't end there. Transitioning doesn't just involve the physical transfer of files but also ensuring that everything runs smoothly in the new environment. This phase is all about monitoring, adjusting, and optimizing your website to achieve the best possible performance.
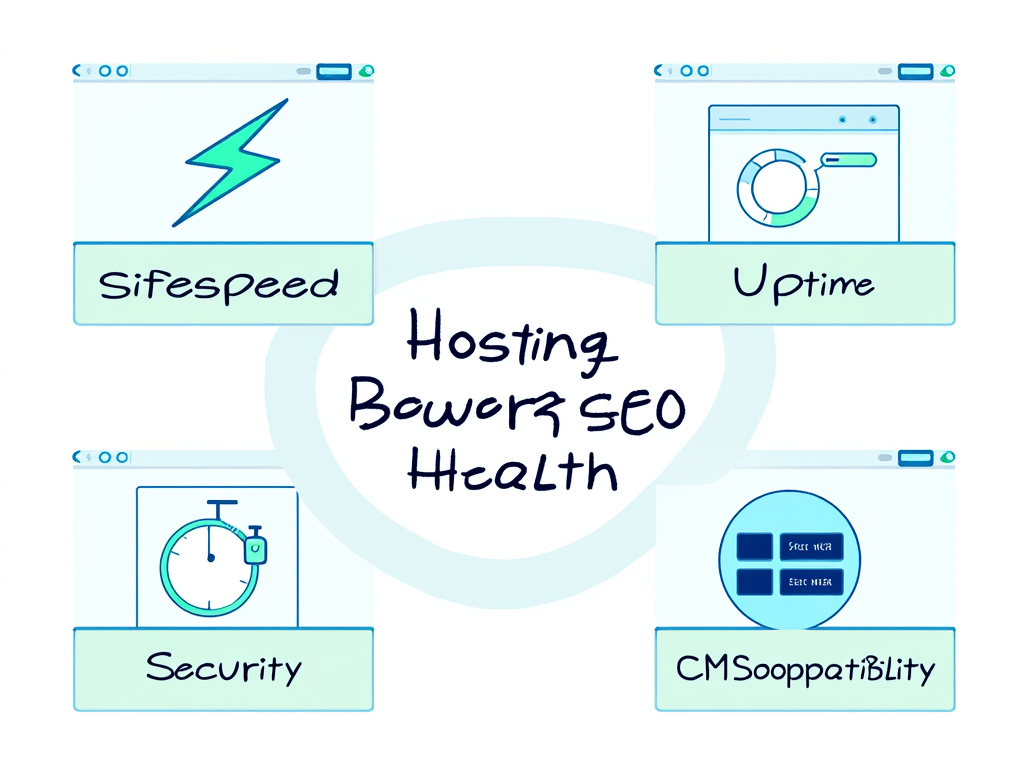
3.1. Monitor Performance and Uptime
ინსტრუმენტები, როგორიცაა Google-ის საძიებო კონსოლი და პინგდომი are invaluable for keeping tabs on your website’s performance post-migration. Be vigilant for any unexpected downtime, slow loading speeds, or significant fluctuations in traffic.
-
Check Page Speed: Use tools such as GTmetrix to analyze page speed. If your load times are slower than they were previously, consider optimizing images, leveraging caching, and implementing a content delivery network (CDN).
-
View Analytics: Keep a close eye on website analytics through platforms like Google Analytics. This way, you can identify any sharp decreases in traffic that could indicate issues with your migration.
3.2. Resolve Common Post-Migration Issues
During the monitoring phase, you may encounter some common issues that can arise after migration:
-
Mixed Content Warnings: If you switched to HTTPS and encounter mixed content warnings, ensure that all resources (images, scripts, stylesheets) are loaded via HTTPS.
-
Broken Links: Utilize tools like გატეხილი ბმულების შემმოწმებელი to scan your site for broken links. Redirect users to the correct pages and update your sitemap to reflect any changes.
-
Plugin Compatibility: Post-migration can often reveal compatibility issues with plugins. Regularly check for updates and consider disabling inactive plugins to streamline performance.
Final Steps: SEO and User Experience
Your site may be technically sound, but what about its visibility and user-friendliness? After a migration, it's essential to ensure that your optimization efforts are in full force.
4.1. Update and Submit Sitemap
Once your website is fully operational, it’s crucial to revisit your sitemap. If any URLs have changed, ensure that the new sitemap reflects these changes accurately. Submit it to search engines like Google via Google-ის საძიებო კონსოლი. This action informs search engines about your site structure and helps them crawl effectively.
4.2. Ensure User Experience Remains Intact
User experience should always be at the forefront of your mind. Throughout the migration, regularly seek feedback from users. Are they encountering issues navigating your site? Is the content displaying as it should? Monitor their interactions and make adjustments where necessary.
Long-Term Maintenance and Support
Migrating to a new host is a major step, but maintaining that momentum afterward is equally vital.
-
რეგულარული განახლებები: Keep your CMS, themes, and plugins updated to protect against vulnerabilities and ensure optimal functionality.
-
Frequent Backups: Establish a backup schedule to regularly secure your website’s data. Many hosting providers offer automated backups, but consider off-site backups as an additional safety net.
-
Ongoing Performance Checks: Schedule routine checks on your website’s speed, uptime, and overall performance. This habit will alert you to potential issues well in advance of them affecting your users.
დასკვნა
Moving your website to a new hosting provider can seem daunting. However, this detailed approach allows you to navigate the complexities with confidence and clarity. From choosing the right host and executing a smooth migration to monitoring performance and ensuring ongoing user satisfaction, each step is an essential element of the process.
The result? A more robust, faster, and user-friendly website that retains its SEO value while positioning your brand for long-term success. Always remember that migration is not merely a one-time task but an ongoing relationship that requires responsiveness to both technological changes and user needs.
By implementing these practices, you stand ready to embrace the possibilities that come with your empowered online presence.
For more guidance on optimizing your site or tackling technical challenges, check out the following video: секреты настройки с Make.com.
Want to deepen your understanding of website management and automation? Explore the resources below:
- სწავლება make.com-ზე: Узнайте больше и начните обучение сегодня.
- ბლუპრინტები make.com-ზე: Получите доступ к эксклюзивным блюпринтам.
Keep your knowledge fresh and stay connected to the latest trends in website technology and management.


დატოვეთ გამოხმაურება ამის შესახებ